When designing a large assembly using CATIA, the screen tends to become complicated and operation slows down. Here, we will explain the specific steps to use CATIA’s “Layer” function to organize parts and elements and improve work efficiency.
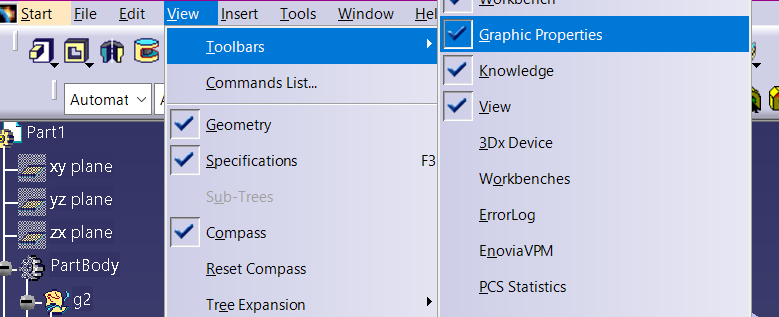
1. Display the Graphics Properties toolbar
From the CATIA menu, select “View” > “Toolbars”. Check “Graphics Properties” from the toolbar list displayed to display the toolbar. It is usually displayed on the right side or bottom of the screen.

2. Assign layer numbers
Next, classify each element by layer number. In the tree or 3D screen, select the element (part or geometry) you want to classify into a layer. Click the drop-down list with the “Layer” number on the “Graphics Properties” toolbar. Select any layer number (between 0 and 999) from the list. After selection, the layer number will be assigned to the element.
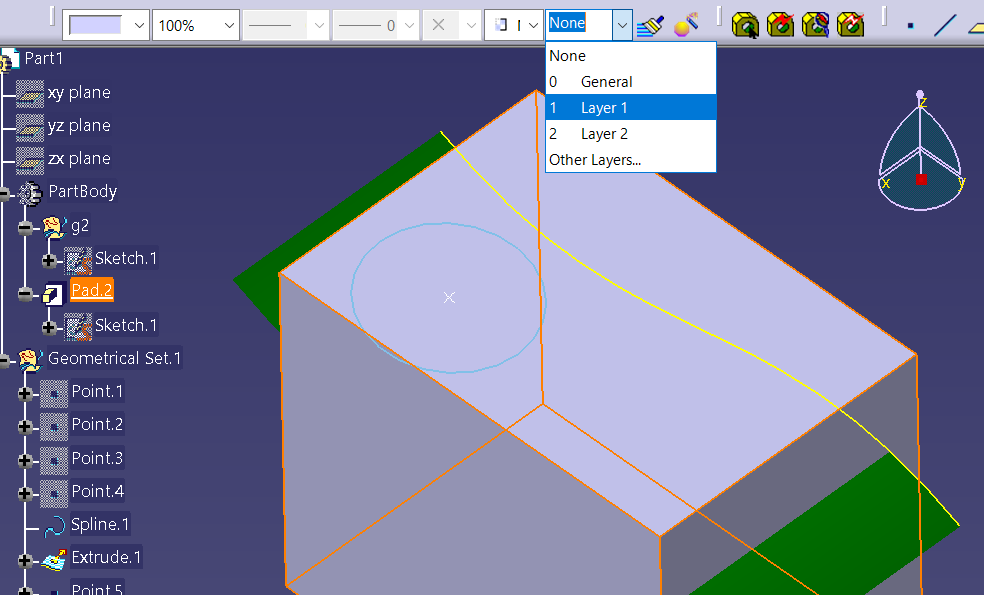
Example) Layer 1: Exterior parts, Layer 2: Interior and structural parts, Layer 3: Small parts such as bolts and nuts. In this screen, Layer 1 is a cube and Layer 2 is a surface.
3. How to switch layer display
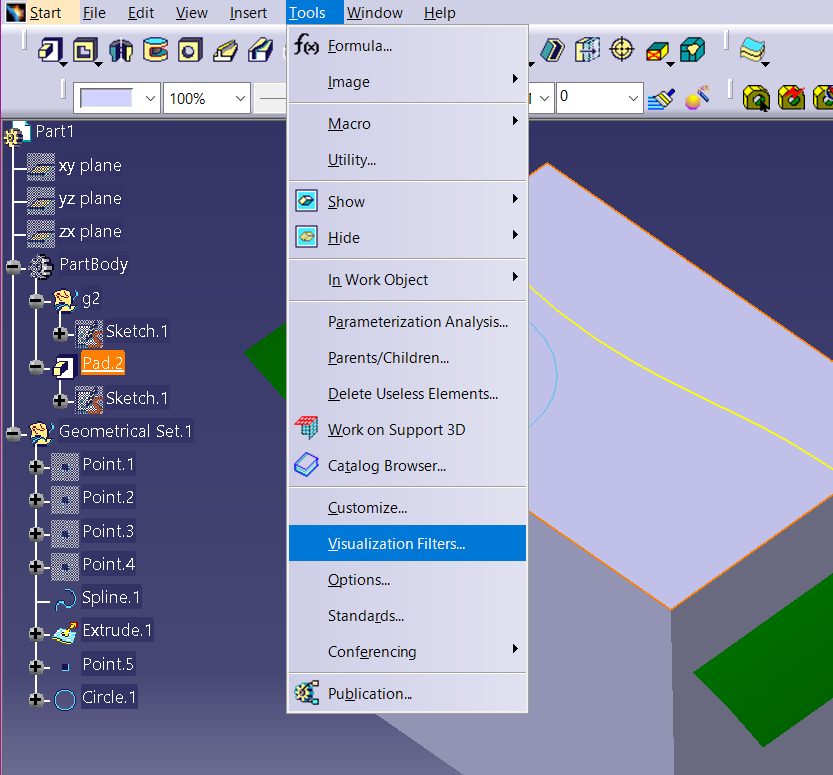
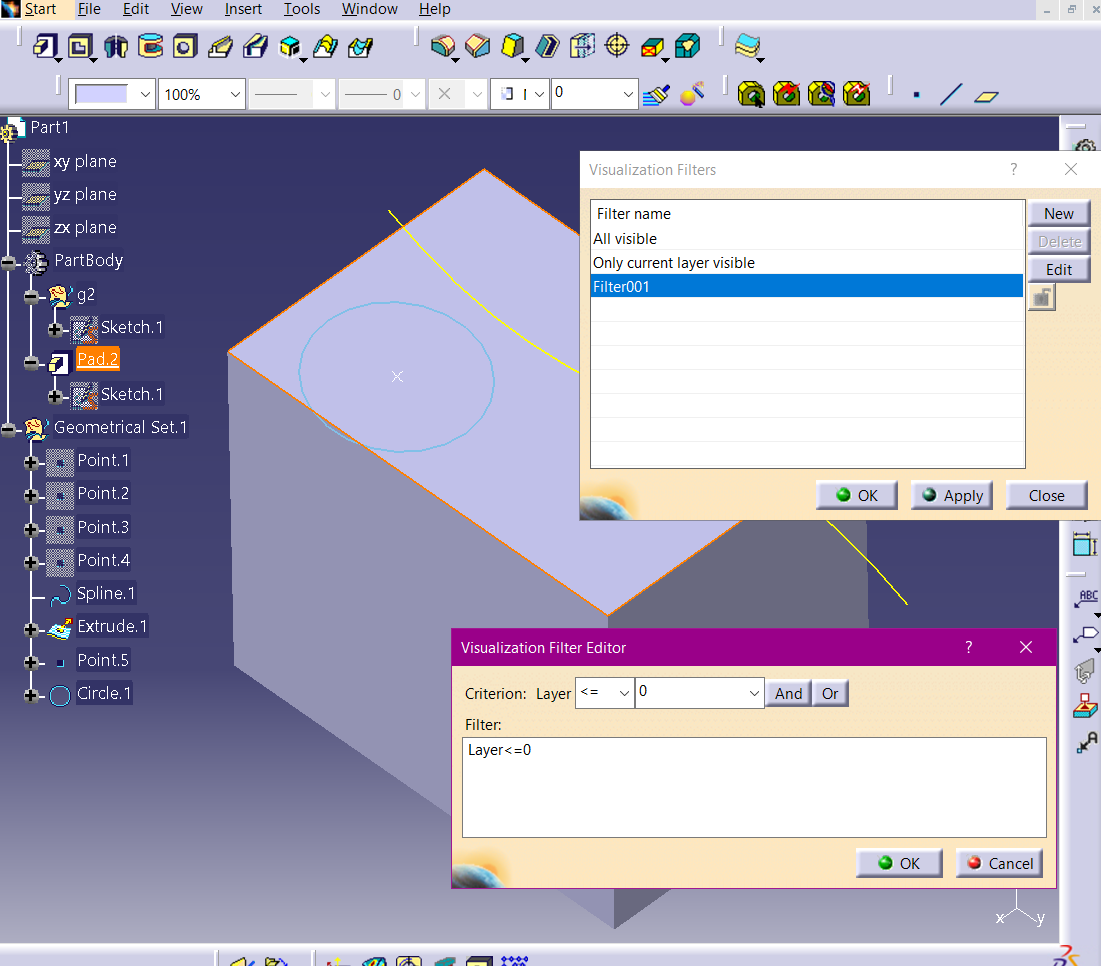
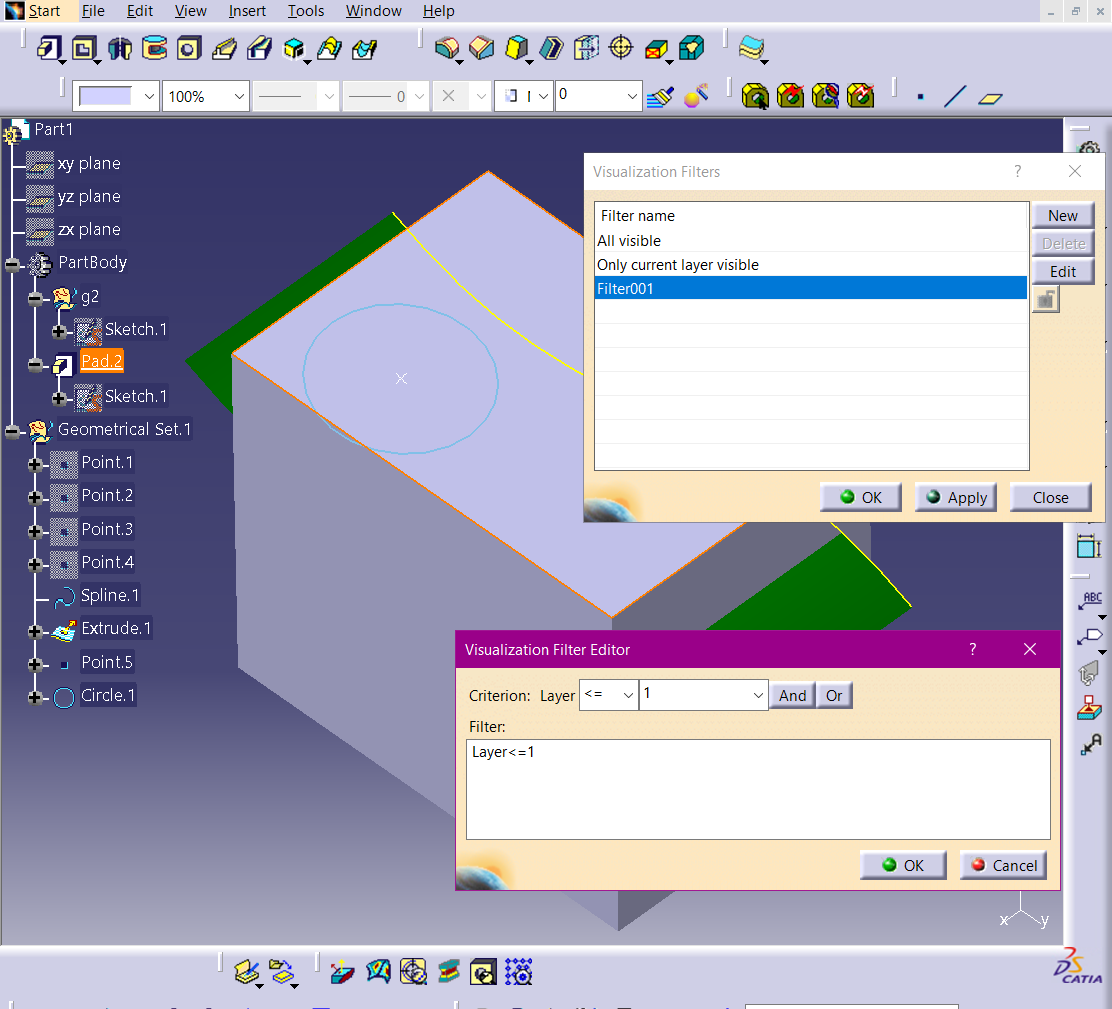
Use the assigned layer number to switch between visible and hidden. Select a filter in the “Layer Filter” dialog displayed by Tools > Visualization Filters. You can edit the filter by Edit, and you can use calculations using numbers in the filter. Click “Apply” or “OK” to show/hide only the elements of the specified layer.
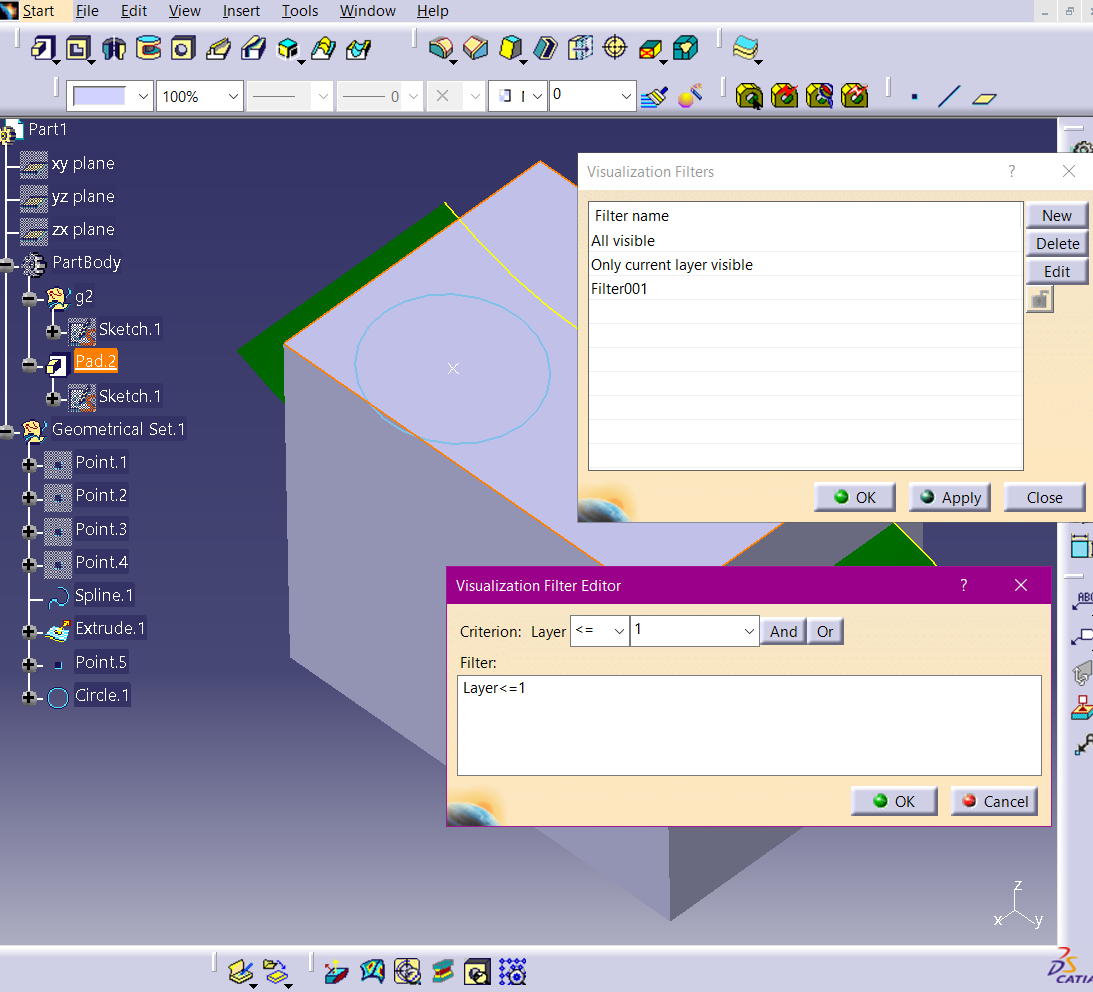
Example) If you set the layer filter to 1 or less, only cubes will be displayed. If you include 2, the surface will also be displayed because it is set to layer 2.
4. How to check layers
To check which layer each element is assigned to, right-click the element and select “Properties”. You can check the currently assigned layer number in the “Graphics” tab of the properties screen.
Summary
CATIA’s layer management function allows you to maintain a smooth working environment even with large assemblies. If you are having trouble with slow operations, please try setting layers using the steps above.